Oreo Cheesecake Slice
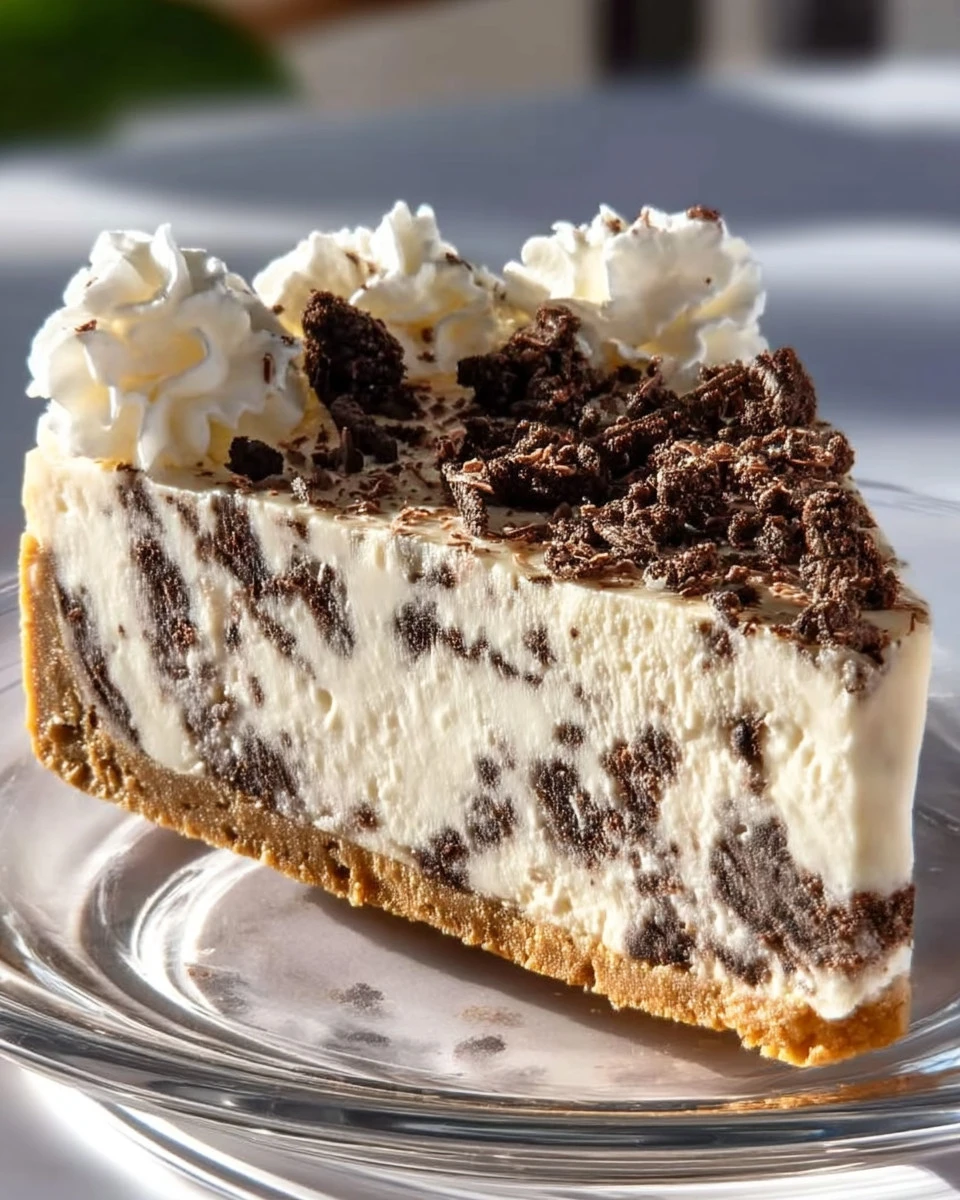
Oreo Cheesecake Slice
If you love Oreos and cheesecake, then the Oreo Cheesecake Slice is the perfect dessert for you! This delicious treat combines creamy cheesecake with the classic crunch of Oreo cookies. It’s easy to make, and will impress your friends and family. Let’s dive into why you should make this delightful dessert and how you can whip it up in your own kitchen.
Why Make This Recipe
The Oreo Cheesecake Slice is a crowd-pleaser that fits any occasion. Whether you’re hosting a party, celebrating a birthday, or just want to enjoy a sweet treat at home, this cheesecake is the way to go. It’s rich and creamy, with a delightful chocolate flavor from the Oreos. Plus, it’s simple to make, requiring no baking beyond the crust. This means you can enjoy your cheesecake with minimal effort!
How to Make Oreo Cheesecake Slice
Making an Oreo Cheesecake Slice is not only fun, but it’s also straightforward. Just follow these steps and you will have a delicious dessert ready to share.
Ingredients:
- 24 Oreo cookies (crushed into crumbs)
- 5 tbsp unsalted butter (melted)
- 3 cups cream cheese (softened)
- 1 cup powdered sugar
- 1 1⁄2 cups heavy whipping cream
- 1 tsp vanilla extract
- 12 crushed Oreo cookies (mixed in)
- 4-5 Oreo cookies (crushed for garnish)
- 2 tbsp white chocolate (melted for drizzling)
Directions:
-
Preheat your oven to 350°F (175°C). Take 24 Oreos and crush them into fine crumbs. Mix these crumbs with melted butter, then press the mixture into the bottom of a 9-inch springform pan. Bake this crust for 10 minutes, then allow it to cool.
-
In a mixing bowl, beat together the softened cream cheese and powdered sugar until smooth. In another bowl, whip the heavy cream until you form stiff peaks. Carefully fold the whipped cream into the cream cheese mixture. Next, stir in the 12 crushed Oreos for added flavor.
-
Pour the cheesecake filling over the cooled Oreo crust. Cover the pan and place it in the refrigerator for at least 4 hours, allowing it to set properly.
-
After the cheesecake has set, you can top it with the remaining crushed Oreos. You can also drizzle some melted white chocolate over the top for an extra treat.
-
Slice the cheesecake and serve it chilled. Enjoy!
How to Serve Oreo Cheesecake Slice
For serving, take a slice of the Oreo Cheesecake and place it on a dessert plate. It can be garnished with a few crushed Oreos or a dollop of whipped cream. It also pairs beautifully with a scoop of vanilla ice cream if you want to add a bit more indulgence!
How to Store Oreo Cheesecake Slice
To store any leftovers, place the cheesecake in an airtight container. You can keep it in the refrigerator for up to 5 days. If you’re freezing it, wrap it tightly with plastic wrap and aluminum foil. It can last for up to 3 months in the freezer.
Tips to Make Oreo Cheesecake Slice
- Make sure the cream cheese is softened to room temperature to avoid lumps in your mixture.
- Whip the heavy cream just until stiff peaks form; over-whipping can create a grainy texture.
- If you want a thicker cheesecake, you can add another package of cream cheese.
Variation
You can add different toppings for a twist! Consider using caramel sauce, chocolate ganache, or fresh berries for an alternative flavor. Experimenting can lead to even more delicious combinations!
FAQs
1. Can I use low-fat cream cheese?
Yes, low-fat cream cheese can be used, but it may affect the creaminess of the cheesecake.
2. Is it necessary to use a springform pan?
A springform pan is ideal for cheesecakes because it allows easy removal. If you don’t have one, you can use a regular pie dish, but it may be harder to serve.
3. How long does the cheesecake need to set?
For the best texture, refrigerate it for at least 4 hours or overnight for a firmer slice.
With this Oreo Cheesecake Slice recipe, you are all set to delight your taste buds and impress your guests. It’s simple, delicious, and perfect for any occasion! Enjoy your baking!
Oreo Cheesecake Slice
Ingredients
For the Crust
- 24 pieces Oreo cookies crushed into crumbs
- 5 tbsp unsalted butter melted
For the Cheesecake Filling
- 3 cups cream cheese softened
- 1 cup powdered sugar
- 1.5 cups heavy whipping cream
- 1 tsp vanilla extract
- 12 pieces Oreo cookies crushed for mixing in
For Garnishing
- 4-5 pieces Oreo cookies crushed for garnish
- 2 tbsp white chocolate melted for drizzling
Instructions
Preparation
- Preheat your oven to 350°F (175°C).
- Crush 24 Oreos into fine crumbs and mix with melted butter, then press into the bottom of a 9-inch springform pan.
- Bake the crust for 10 minutes, then allow to cool.
Making the Cheesecake Filling
- In a mixing bowl, beat the softened cream cheese and powdered sugar until smooth.
- In another bowl, whip the heavy cream until stiff peaks form.
- Carefully fold the whipped cream into the cream cheese mixture and stir in 12 crushed Oreos.
Setting the Cheesecake
- Pour the cheesecake filling over the cooled Oreo crust.
- Cover and refrigerate for at least 4 hours or until set.
Serving
- Top the cheesecake with the remaining crushed Oreos and drizzle with melted white chocolate.
- Slice and serve chilled.