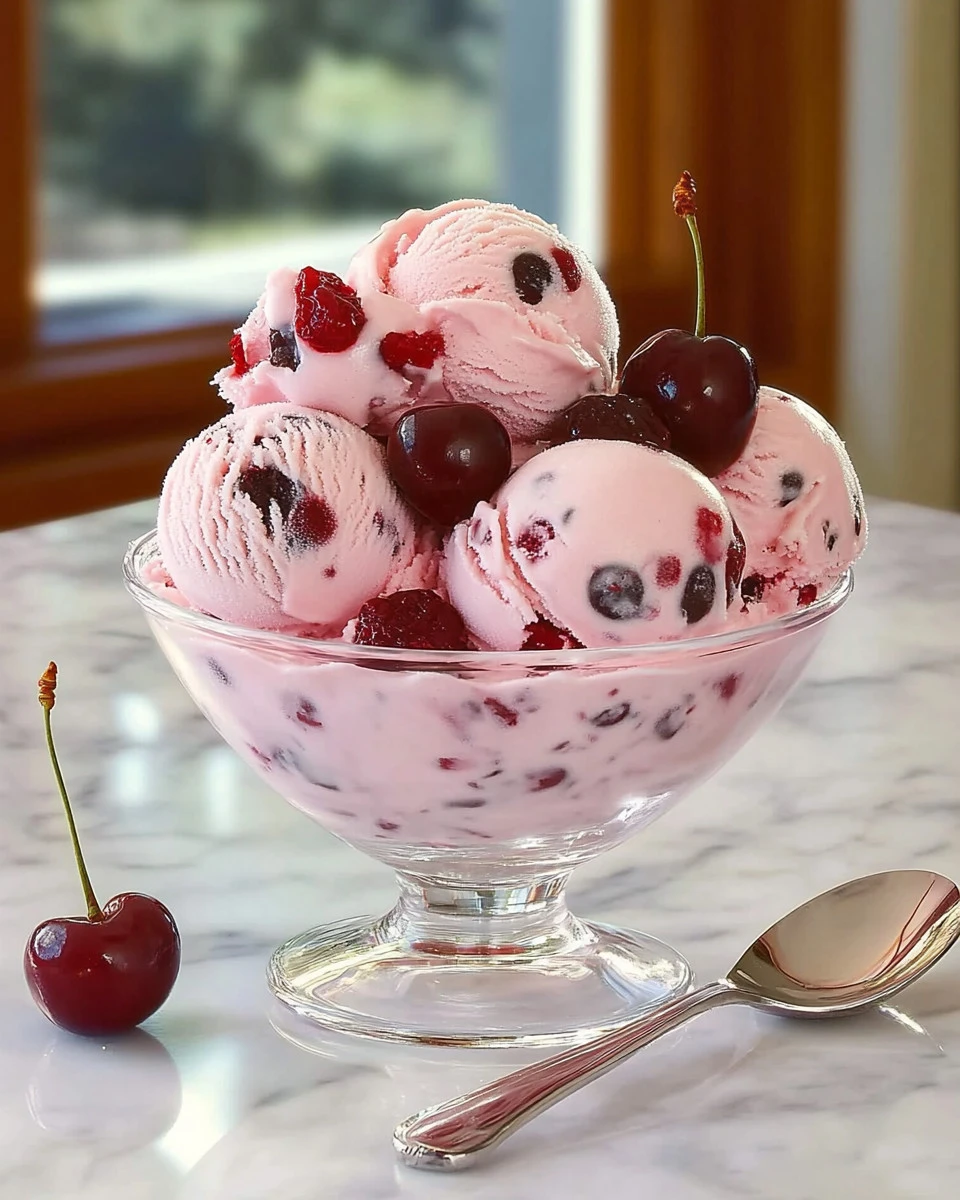
Homemade Cherry Ice Cream
Homemade Cherry Ice Cream
Introduction
Homemade Cherry Ice Cream is a delightful treat that brings the sweet, luscious flavor of cherries right into your bowl. With creamy texture and a burst of fruitiness, this ice cream is perfect for warm days when you crave something cool and refreshing. Making ice cream at home is easier than you think, and this cherry flavor is sure to become a favorite in your household!
Why Make This Recipe
You should make this recipe for several reasons. First, cherries are in season for a limited time, and using fresh ingredients means your ice cream will taste vibrant and delicious. Second, making ice cream at home allows you to control the ingredients—no preservatives or artificial flavors here! Third, who doesn’t love the satisfaction of making your own treats? Plus, your friends and family will be impressed by this tasty dessert!
How to Make Homemade Cherry Ice Cream
Making this homemade cherry ice cream is a fun and straightforward process. You’ll need only a few simple ingredients, and the steps are easy to follow.
Ingredients:
- 2 cups cherries, pitted and halved
- 1 cup heavy cream
- 1 cup whole milk
- 3/4 cup granulated sugar
- 1 teaspoon vanilla extract
- Pinch of salt
Directions:
- Start by tossing the pitted and halved cherries into a medium bowl with 1/4 cup of sugar. Let them sit for about 30 minutes to macerate. This will help the cherries release their juices.
- In a separate bowl, whisk together the heavy cream, whole milk, the remaining sugar, vanilla extract, and a pinch of salt until the sugar is fully dissolved. This mixture will give your ice cream its rich, creamy texture.
- Once your cherry mixture is ready, fold it into the cream mixture and stir until fully combined. Make sure the cherries are evenly mixed in!
- Pour this mixture into your ice cream maker and churn according to the manufacturer’s instructions until you get a soft-serve consistency. This process usually takes about 20-30 minutes.
- Transfer your ice cream into a lidded container and freeze for at least 4 hours, or until it’s firm enough to scoop. Be patient—it will be worth the wait!
- Serve up your homemade cherry ice cream in a bowl or cone, and enjoy!
How to Serve Homemade Cherry Ice Cream
You can serve this cherry ice cream in a variety of ways. A classic option is to scoop the ice cream into a bowl and enjoy it on its own. If you want to add a special touch, consider topping it with whipped cream, chocolate sauce, or a sprinkle of chopped nuts. You can also serve it in a cone for a fun, handheld treat!
How to Store Homemade Cherry Ice Cream
To store your homemade cherry ice cream, place it in an airtight container and keep it in the freezer. This will help maintain its creamy texture and prevent it from developing ice crystals. It’s best enjoyed within a few weeks, but it can last for up to two months in the freezer.
Tips to Make Homemade Cherry Ice Cream
- Use fresh, ripe cherries for the best flavor.
- Make sure to whisk the cream mixture until the sugar is dissolved; this ensures a smoother ice cream.
- If you don’t have an ice cream maker, you can place the mixture in a shallow container and stir it every 30 minutes while it freezes.
Variation
You can modify this recipe by adding chocolate chips, using different fruits, or even swirls of caramel for extra flavor. Feel free to experiment with your favorite ingredients to create your own version!
FAQs
1. Can I use frozen cherries?
Yes, you can use frozen cherries! Just let them thaw before mixing them with sugar.
2. How long does it take to make this ice cream?
The total time includes about 30 minutes of preparation and 4 hours of freezing, so plan accordingly.
3. Can I make this recipe without an ice cream maker?
Yes! You can manually freeze and stir the mixture every 30 minutes until it reaches your desired consistency, but it may take longer.
Enjoy making your homemade cherry ice cream! It’s a fun and rewarding experience that will surely satisfy your sweet tooth.