Rhubarb Dream Bars Recipe
Rhubarb Dream Bars Recipe
Introduction
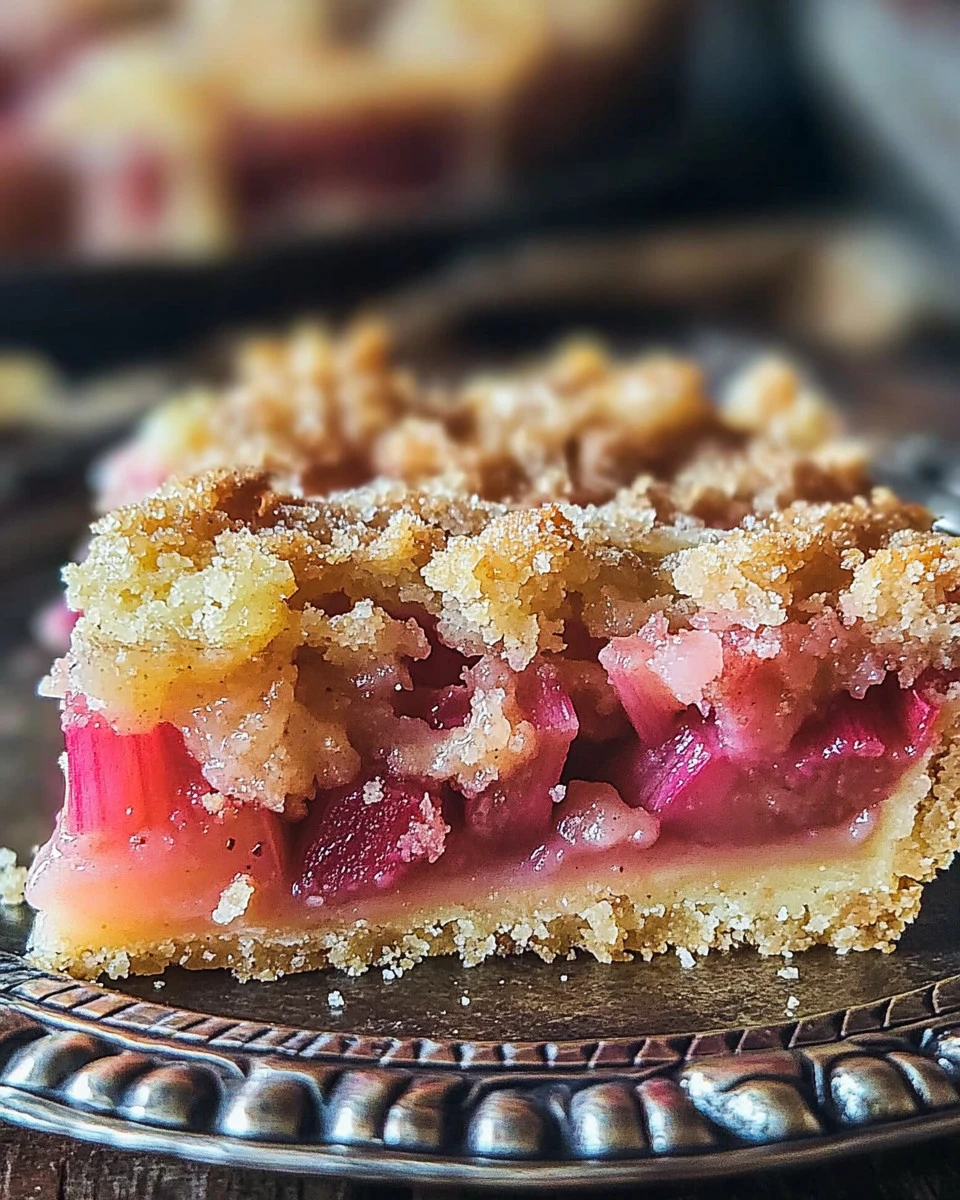
Rhubarb Dream Bars are a delightful treat that brings together the tartness of rhubarb and the sweetness of a buttery crust. This recipe creates a perfect balance between sweet and tangy, making it an ideal dessert for any occasion. Whether you’re serving them at a summer picnic or enjoying a quiet afternoon at home, these bars are sure to please. With a simple preparation and a few ingredients, you can create a delicious dessert that everyone will love.
Why Make This Recipe
There are plenty of reasons to make Rhubarb Dream Bars. First and foremost, they feature rhubarb, a unique and often underappreciated ingredient. Rhubarb has a natural tart flavor that pairs beautifully with sweet ingredients, creating a delicious contrast. Furthermore, these bars are easy to prepare, making them perfect for both novice and experienced bakers. The ingredients are readily available, and the baking process is straightforward, resulting in a dessert that looks and tastes impressive without requiring advanced skills.
How to Make Rhubarb Dream Bars
Making Rhubarb Dream Bars involves a few simple steps. You will start by preparing the crust, followed by the filling, and then baking everything together. Here’s how you can make them yourself.
Ingredients:
- 1 cup all-purpose flour
- 1/2 cup butter, softened
- 1/4 cup powdered sugar
- 1 cup sugar
- 1/4 cup all-purpose flour
- 2 large eggs
- 1/2 teaspoon vanilla extract
- 2 cups rhubarb, diced
Directions:
- Preheat your oven to 350°F (175°C).
- Grease a 9×13 inch baking dish.
- In a medium bowl, mix together 1 cup of flour, softened butter, and powdered sugar until a crumbly dough forms.
- Press the dough evenly into the bottom of the prepared baking dish.
- Bake for 15 minutes, or until lightly golden.
- In a large bowl, whisk together 1 cup of sugar and 1/4 cup of flour.
- Add the eggs and vanilla extract, and mix until smooth.
- Fold in the diced rhubarb.
- Pour the rhubarb mixture over the pre-baked crust, spreading it evenly.
- Bake for an additional 40-45 minutes, or until the filling is set and lightly golden.
- Allow the bars to cool completely in the baking dish before cutting into squares.
How to Serve Rhubarb Dream Bars
Rhubarb Dream Bars can be served as is or with a dusting of powdered sugar on top for added sweetness. You may also serve them with a dollop of whipped cream or a scoop of vanilla ice cream. They make an excellent dessert at barbecues, family gatherings, or as a snack with tea or coffee.
How to Store Rhubarb Dream Bars
To store your Rhubarb Dream Bars, keep them in an airtight container at room temperature for up to three days. If you want to keep them longer, you can refrigerate them for up to a week. For longer storage, wrap them tightly and freeze for up to three months. Just thaw them in the refrigerator before serving.
Tips to Make Rhubarb Dream Bars
- Make sure your rhubarb is fresh for the best flavor. Look for firm, bright stalks.
- If you find rhubarb too tart, you can add a bit more sugar to the filling.
- Use parchment paper in the baking dish for easier removal and cleanup.
Variation
If you want to switch things up, consider adding other fruits like strawberries or blueberries along with the rhubarb for a mixed fruit flavor. This will give the bars a different taste and add some color to the dish.
FAQs
1. Can I use frozen rhubarb?
Yes, you can use frozen rhubarb. Just let it thaw and drain any excess moisture before adding it to the filling.
2. How do I know when the bars are done baking?
The bars are done when the filling is set and lightly golden on top. You can also insert a toothpick in the center; it should come out clean.
3. Can I make these bars ahead of time?
Absolutely! Rhubarb Dream Bars can be made a day or two in advance. Just store them properly and they will still taste great!
Enjoy your Rhubarb Dream Bars! Happy baking!