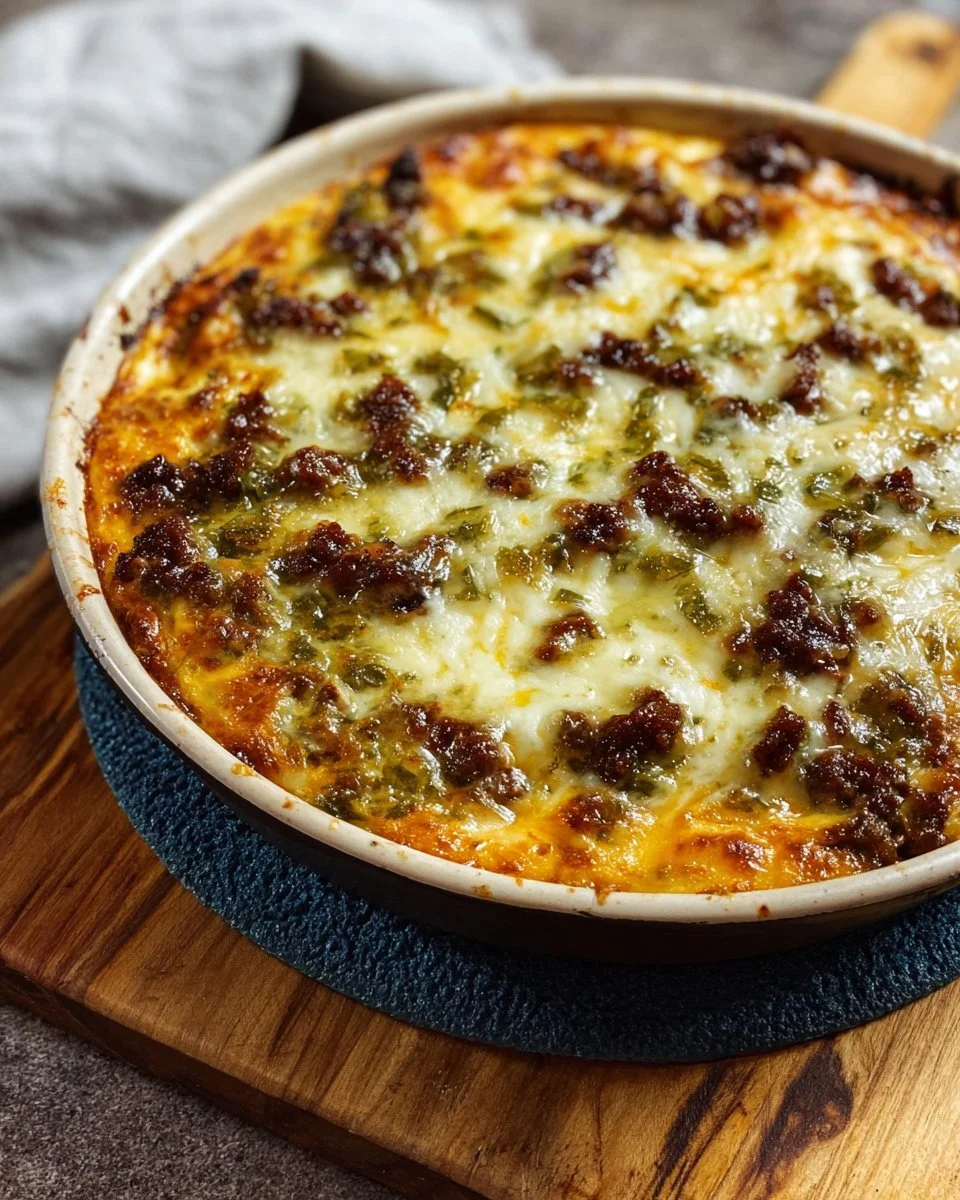
Green Chile Cast Iron Enchiladas
Green Chile Cast Iron Enchiladas Recipe
Are you ready to elevate your dinner game with a warm and comforting dish? Look no further than Green Chile Cast Iron Enchiladas! Bursting with flavor, these enchiladas are stuffed with shredded chicken and black beans, smothered in green chile enchilada sauce, and topped with oozing melted cheese. This simple one-skillet meal is perfect for busy weeknights and is sure to be a hit with family and friends.
Why Make This Recipe
There are many reasons to try these delicious Green Chile Cast Iron Enchiladas. First, they are incredibly tasty, combining the rich flavors of green chiles with tender chicken and creamy cheese. Second, they are easy to prepare, making them an ideal choice for both novice and experienced cooks. Finally, using a cast iron skillet not only makes for beautiful presentation but also ensures even cooking throughout. You’ll love the authentic taste and satisfying texture of these enchiladas.
How to Make Green Chile Cast Iron Enchiladas
Follow these steps to create an unforgettable meal.
Ingredients
- 8 corn tortillas
- 2 cups shredded cooked chicken
- 1 cup green chile enchilada sauce
- 1 cup shredded cheese (cheddar or Monterey Jack)
- 1 cup black beans (optional)
- 1/2 cup diced onions
- 1/2 cup chopped cilantro
- 1 teaspoon cumin
- 1 teaspoon garlic powder
- Salt and pepper to taste
Directions
- Preheat your oven to 375°F (190°C).
- In a mixing bowl, combine the shredded chicken, black beans (if using), diced onions, cumin, garlic powder, salt, and pepper. Stir until well mixed.
- To make the tortillas more pliable, warm them slightly in the microwave or a skillet for a few seconds.
- Take each tortilla and fill it with a generous portion of the chicken mixture. Roll them up and place them seam-side down in a cast iron skillet.
- Pour the green chile enchilada sauce over the rolled tortillas, making sure they are well coated.
- Sprinkle the shredded cheese on top, ensuring a nice layer for optimal melting.
- Bake in the preheated oven for 20-25 minutes, or until the cheese is bubbling and golden.
- Garnish with chopped cilantro before serving for an added touch of freshness.
How to Serve Green Chile Cast Iron Enchiladas
To serve, plate the enchiladas directly from the skillet for a rustic presentation. Consider adding a dollop of sour cream, sliced avocado, or fresh salsa on the side. Pair these enchiladas with a simple green salad or Mexican rice for a complete meal.
How to Store Green Chile Cast Iron Enchiladas
If you have leftovers, store them in an airtight container in the refrigerator for up to 3 days. Reheat them in the oven at 350°F (175°C) until warmed through. Avoid microwaving as it can make the tortillas soggy.
Tips to Make Green Chile Cast Iron Enchiladas
- For added flavor, sauté the diced onions in a little olive oil before adding them to the chicken mixture.
- Feel free to experiment with different types of cheese or beans to match your tastes.
- If you’re looking for extra spice, add some diced jalapeños to the filling before rolling.
Variations
- Vegetarian Option: Replace the chicken with roasted vegetables or mushrooms.
- Spicy Version: Use spicy green chile sauce or add cayenne pepper to the chicken mixture for an extra kick.
- Gluten-Free: Ensure that the corn tortillas are labeled gluten-free for a safe meal option.
FAQs
-
Can I use flour tortillas instead of corn tortillas?
Yes, flour tortillas can be used, but they will alter the traditional taste and texture of the enchiladas. -
What if I don’t have shredded chicken?
You can use rotisserie chicken or any leftover cooked chicken, or substitute with plant-based protein for a vegetarian option. -
Can I freeze Green Chile Cast Iron Enchiladas?
Yes, you can freeze them before baking. Wrap tightly in plastic and foil, then bake from frozen, adding extra time until heated thoroughly.
Enjoy making these Green Chile Cast Iron Enchiladas that are not only delectable but also easy enough for any weeknight dinner!

Green Chile Cast Iron Enchiladas
Ingredients
Main Ingredients
- 8 pieces corn tortillas
- 2 cups shredded cooked chicken Can use rotisserie chicken.
- 1 cup green chile enchilada sauce Use spicy if preferred.
- 1 cup shredded cheese (cheddar or Monterey Jack) Opt for your favorite cheese.
- 1 cup black beans Optional.
- 1/2 cup diced onions Sauté in olive oil for added flavor.
- 1/2 cup chopped cilantro For garnish.
- 1 teaspoon cumin
- 1 teaspoon garlic powder
- to taste Salt and pepper
Instructions
Preparation
- Preheat your oven to 375°F (190°C).
- In a mixing bowl, combine the shredded chicken, black beans (if using), diced onions, cumin, garlic powder, salt, and pepper. Stir until well mixed.
- Warm the corn tortillas slightly in the microwave or a skillet for a few seconds to make them pliable.
Assembly
- Take each tortilla and fill it with a generous portion of the chicken mixture. Roll them up and place them seam-side down in a cast iron skillet.
- Pour the green chile enchilada sauce over the rolled tortillas, ensuring they are well coated.
- Sprinkle the shredded cheese on top for optimal melting.
Baking
- Bake in the preheated oven for 20-25 minutes, or until the cheese is bubbling and golden.
- Garnish with chopped cilantro before serving.